The speech-driven animation(sda) model works quite well, even though it’s not as precise as the result from VOCA, which trained the audio to the keypoints mouth movements, the fact that sda trained from video footages gives it a nice real touch. Out of the three trained models that the author provided, I found that the GRID dataset has the most natural-looking results and better precision. And I’ve decided to mainly work on the GRID dataset.
The GRID dataset contains video looks like this:
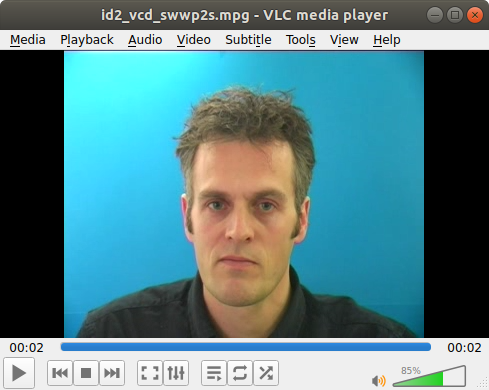
This sda model uses face-alignment to align each frame of the video so that it becomes trainable. It also cropped the frame to 128×96 and therefore only 128×96 video will be produced, and a 128×96 image that is aligned is required to produce the image. And therefore, an aligned image from a video is provided in the demo.

I’ve also tried with other images (other frames from GRID dataset), sometimes the result is better and sometimes is worse. Maybe because I manually cropped the image from a frame instead of using the program’s code to crop an aligned image. For the final draft, I’m gonna leave it as it is, using the image that the author provides.


I’ve tried the following images(unaligned), and certainly the produced videos has black edges after alignment(some are rotated and cropped I believe).
bottom part is cropped to be aligned
from a frame of the gif provided in the github repoe
a frame from video
Implementing in deepstory
Conveniently, the whole sda code is wrapped in a class, and I’ve copied the whole folder into the modules folder of my project. Still, there are some changes that needs to be made to the modules.
- Change the default model to be GRID and load the data site.
- The class originally reads an audio file and store its sampling rate as a class variable. Since a generated NumPy array will be the audio data, I need to manually specify the sampling rate as the sampling rate in my dctts sampling rate configuration.
- The class also has a method to pack both video array and audio array into a complete video by calling ffmpeg. I referenced from it and write a modified version of it to be used in the final stage. The same thing, I modify it so that it’s not reading the sampling rate from the instance but from a parameter.
snippet from util.py
# code from sda
def save_video(video, audio, path, fs, overwrite=True, experimental_ffmpeg=False, scale=None):
    if not os.path.isabs(path):
        path = os.getcwd() + "/" + path

    with tempdir() as dirpath:
        # Save the video file
        writer = sio.FFmpegWriter(dirpath + "/tmp.avi",
                                  inputdict={'-r': str(25) + "/1", },
                                  outputdict={'-r': str(25) + "/1", }
                                  )
        for i in range(video.shape[0]):
            frame = np.rollaxis(video[i, :, :, :], 0, 3)

            if scale is not None:
                frame = tf.rescale(frame, scale, anti_aliasing=True, multichannel=True, mode='reflect')

            writer.writeFrame(frame)
        writer.close()

        # Save the audio file
        scipy.io.wavfile.write(dirpath + "/tmp.wav", fs, audio)

        in1 = ffmpeg.input(dirpath + "/tmp.avi")
        in2 = ffmpeg.input(dirpath + "/tmp.wav")
        if experimental_ffmpeg:
            out = ffmpeg.output(in1['v'], in2['a'], path, strict='-2', loglevel="panic")
        else:
            out = ffmpeg.output(in1['v'], in2['a'], path, loglevel="panic")

        if overwrite:
            out = out.overwrite_output()
        out.run()
fs is the sampling rate and the output video is 25 fps. And this should apply to the video generated by first-order model using the sda video as the driving video.
Using it in deepstory
snippet from deepstory.py
def wav_to_vid(self):
    torch.cuda.empty_cache()
    va = sda.VideoAnimator(gpu=0)  # Instantiate the animator
    for i, wavs_dict in enumerate(self.wavs_dicts):
        self.wavs_dicts[i]['base'] = va('data/sda/image.bmp', wavs_dict['wav'], fs=hp.sr)
    del va
    torch.cuda.empty_cache()
In case of out of memory error, since this is not written as a class in a context manager use, I will clear the VRAM used by PyTorch first then create the instance of VideoAnimator named va. Looping through the wavs_dicts that I created after combining consecutive clips(so that each item in the wav_dict is a different speaker to accelerate generation time). The model will generate an array of images in each wav_dict as ‘base’. After generation, the va instance is deleted to release memory, and torch.cuda.empty_cache() is called again to flush the VRAM.
First-order model
The key files are quite scattered in the original repo, I had to retrace the whole flow to select the required files(some files are for training). I also trimmed some files so that minimal files are needed. They are copied under the modules/fom folder. For the animating part, I referenced from the make_animation function from demo.py from the original repo. However, there are some huge problems.
- The original image and video loading are resized using skimage resize, which is done by CPU and will be incredibly slow.
- The operation of video loading is slowed and taking up lots of ram after resizing and normalize the color value of 0-255 to 0-1 float32.
- The axis/dimension placement of the array is used for imageio and thus has a slightly different arrangement than the video array generated from sda. The make_animation code permutes the converted tensor according to the imageio arrangement.
- Batch size = b, color channel = c, height = h, width = w, frames = f
- imageio: (h, w, c)
- sda: (c, h, w)
- required image tensor input for model: (b, c, h, w)
- required video tensor input for model: (b, c, f, h, w)
- The first order model is trained from images cropped to 256×256, so it accepts inputs of 256×256 video and 256×256 image and output 256×256 video.
So here are the solutions:
- All the calculations regarding the array are done after loading as a tensor. This will use the GPU for calculations.
- Using some recent knowledge from another work I did for the course SM2716, which I created a screen to led mapping program using PyTorch tensors for downsampling and upsampling, I will use the same function torch.nn.functional.interpolate to handle all the resizing using bi-linear as the algorithm. And in this case, the interpolate function accepts inputs of (b, c, h, w). Conveniently, interpolate is designed for batch operation, and in this case, the frames are regarded as the batch size dimension.
- The resizing is not simply resizing the whole video, as that would stretch the video(128×96 -> 256×256) and gives a weird result(the movements are too much). So the video must first be scaled so that the longer side(128 in this case) becomes 256. So I call the interpolate to scale it by 2 first. But the model needs 256×256 inputs, so the next step is to pad zeros around the corners.
- To pad the image, I choose the pad zeros on both left and right sides so that the actual frame of the video is in the center. But I doubt that would make any difference since it only recognizes the key points from the video, but still, I think this is better.
I’ve started to test padding in NumPy, then pad it in torch tensor.
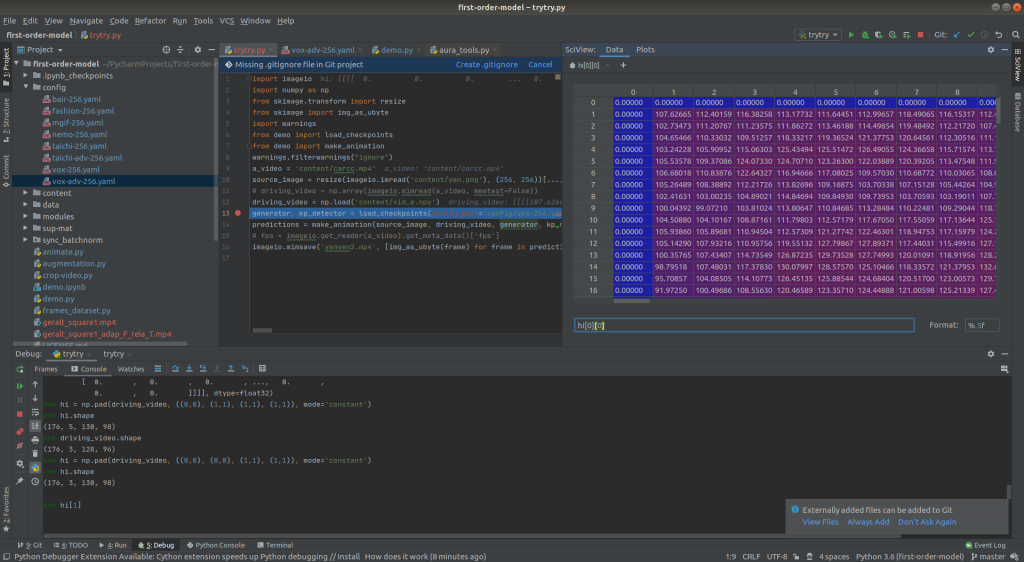
Here is the padding:
F.pad(input=driving, pad=(32, 32, 0, 0, 0, 0, 0, 0), mode='constant', value=0)So I’ve written a class with the same context manager design as the voice class:
animator.py
# SIU KING WAI SM4701 Deepstory
# mostly referenced from demo.py of first order model github repo, optimized loading in gpu vram
import imageio
import yaml
import torch
import torch.nn.functional as F
import numpy as np

from modules.fom import OcclusionAwareGenerator, KPDetector, DataParallelWithCallback, normalize_kp
device = torch.device("cuda:0" if torch.cuda.is_available() else "cpu")


class ImageAnimator:
    def __init__(self):
        self.config_path = 'data/fom/vox-256.yaml'
        self.checkpoint_path = 'data/fom/vox-cpk.pth.tar'
        self.generator = None
        self.kp_detector = None

    def __enter__(self):
        self.load()
        return self

    def __exit__(self, exc_type, exc_val, exc_tb):
        self.close()

    def load(self):
        with open(self.config_path) as f:
            config = yaml.load(f)

        self.generator = OcclusionAwareGenerator(**config['model_params']['generator_params'],
                                                 **config['model_params']['common_params']).to(device)

        self.kp_detector = KPDetector(**config['model_params']['kp_detector_params'],
                                      **config['model_params']['common_params']).to(device)

        checkpoint = torch.load(self.checkpoint_path)

        self.generator.load_state_dict(checkpoint['generator'])
        self.kp_detector.load_state_dict(checkpoint['kp_detector'])

        del checkpoint

        self.generator = DataParallelWithCallback(self.generator)
        self.kp_detector = DataParallelWithCallback(self.kp_detector)

        self.generator.eval()
        self.kp_detector.eval()

    def close(self):
        del self.generator
        del self.kp_detector
        torch.cuda.empty_cache()

    def animate_image(self, source_image, driving_video, relative=True, adapt_movement_scale=True):
        with torch.no_grad():
            predictions = []
            # ====================================================================================
            # adapted from original to optimize memory load in gpu instead of cpu
            source_image = imageio.imread(source_image)
            # normalize color to float 0-1
            source = torch.from_numpy(source_image[np.newaxis].astype(np.float32)).to('cuda') / 255
            del source_image
            source = source.permute(0, 3, 1, 2)
            # resize
            source = F.interpolate(source, size=(256, 256), mode='bilinear', align_corners=False)

            # modified to fit speech driven animation
            driving = torch.from_numpy(driving_video).to('cuda') / 255
            del driving_video
            driving = F.interpolate(driving, scale_factor=2, mode='bilinear', align_corners=False)
            # pad the left and right side of the scaled 128x96->256x192 to fit 256x256
            driving = F.pad(input=driving, pad=(32, 32, 0, 0, 0, 0, 0, 0), mode='constant', value=0)
            driving = driving.permute(1, 0, 2, 3).unsqueeze(0)
            # ====================================================================================
            kp_source = self.kp_detector(source)
            kp_driving_initial = self.kp_detector(driving[:, :, 0])

            for frame_idx in range(driving.shape[2]):
                driving_frame = driving[:, :, frame_idx]
                kp_driving = self.kp_detector(driving_frame)
                kp_norm = normalize_kp(kp_source=kp_source, kp_driving=kp_driving,
                                       kp_driving_initial=kp_driving_initial, use_relative_movement=relative,
                                       use_relative_jacobian=relative, adapt_movement_scale=adapt_movement_scale)
                out = self.generator(source, kp_source=kp_source, kp_driving=kp_norm)
                predictions.append(np.transpose(out['prediction'].data.cpu().numpy(), [0, 1, 2, 3])[0])
        return np.array(predictions) * 255
The code is optimized for doing all calculations as tensors and also call torch.cuda.empty_cache() after closing.
And to use it in the code:
with ImageAnimator() as animator:
    for i, wavs_dict in enumerate(self.wavs_dicts):
        self.wavs_dicts[i]['animated'] = animator.animate_image(
            f'data/images/{image_dict[wavs_dict["speaker"]]}', wavs_dict['base'])
save_video(
    np.concatenate([wavs_dict['base'] for wavs_dict in self.wavs_dicts]),
    self.wav, 'export/base.mp4', hp.sr)
save_video(
    np.concatenate([wavs_dict['animated'] for wavs_dict in self.wavs_dicts]),
    self.wav, 'export/animated.mp4', hp.sr)
So it’s basically looping through the same wavs_dict and create a new key named animated to store the animated array. And a video is saved(base.mp4 is optional for debugging purpose here) in the disk for web app playback since it’s not making sense to store it again in memory.